During public presentations, it can be pretty challenging to transpose from one tab or slide to another in order to keep the audience’s attention. However, the persistent tab-to-tab transposition can cause the audience to lose concentration. What’s the solution? Well! Now, you can simply insert PDF into a word document in order to keep the flow of your presentation going. How does it help? Many professionals need to rewrite the entire PDF document in the word file in order to cover the informational purpose of the file. But, by inserting a PDF Document directly into the Word file, you can save a lot of hours at work and give yourself a pat on the back for SMART thinking.

To begin with, reader’s may think that this is quite an impossible idea to insert a PDF into a word document because there’s no such direct option given in the Microsoft Word features. No worries! Because, to your surprise, there are multiple methods of inserting PDF into Word.
But, before we start learning, here are a few facts that you must know about the process of insert PDF into Word:
Table of Contents
Facts:
- PDF in word document inserts either as an embed file or clickable file, depending on the method you use.
- You can also insert PDF into Word by using the image option. Scroll down to learn how.
- Embed PDF File in word document only prospect the first page of the PDF File, but not the entire document.
- In the event that you use the “link” feature to add a URL-based PDF File in Word document, it may appear as a clickable PDF icon. Or simply the first page of the respective PDF Document.
How to insert PDF into Word File? Methods to Insert PDF File into a Word document
The following method varies in the context of the file appearance of a PDF file in Word Docx. Thus, while you apply one of the following methods to combine PDF and word documents, you may need to compromise on several features. For example, if you insert PDF as a non-clickable content in a word file, you will no longer be able to ingress or view beyond the first page of the PDF File.
Let’s take a glance at different methods that you can adapt:
Method 1: Insert PDF into Word Document as a non-clickable content
- Open the Microsoft Word File on your Windows PC or Mac that you intend to add PDF.
- Ensure you position the cursor on the accurate location where you want the PDF File at the display.
- Further, click on the “Insert” option.
- Go to the “Text” section.
- Now, tap on the “object” symbol.
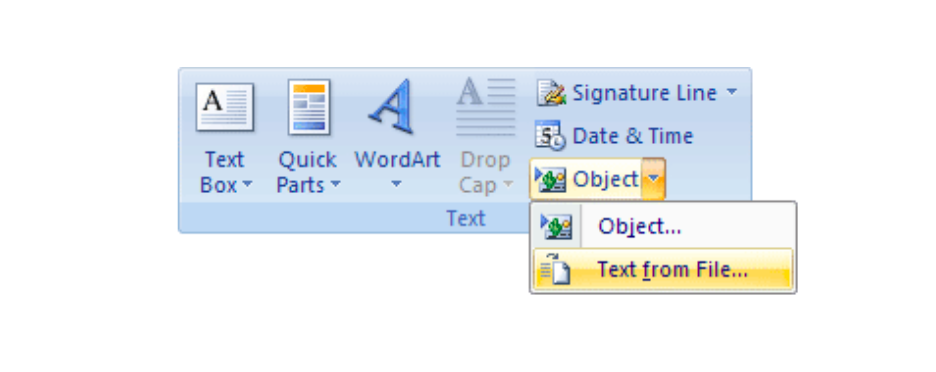
- Then, click on “From File.”
- It will take you to a list of files.
- Among these files, select the PDF File you want to insert in word docx.
- Finally, tap on the “insert” option at the bottom of the select file dialogue box.
- PDF’s first page will appear in your word document successfully.
Precautions to take before inserting PDF into Word:
- Make changes in PDF File beforehand. After the final insert, all the changes that you make in PDF File will not upgrade in the Word Docx.
- When you insert a PDF File in a word document, it is only a copy that appears in word docx. Hence, it remains separated from the original PDF File. Thus, in the case of a signatured PDF, the file’s sensitivity, confidentiality, and authenticity remain at risk.
Method 2: Insert PDF into Word as a clickable content
In many cases, users like to insert PDF into Word as a clickable content for the ease of accessing the PDF File. For example, during word presentation, they can simply click on the PDF icon (inserted PDF) to access the additional data without going through their entire list of files on PC among the clientele or colleagues. And, to be honest, it is the best trick to deal with a lengthy presentation when you have too much information to share with your audience.
Thus, here’s how you can embed a PDF into a word document as a clickable content.
- Open the word document for which you intend to add the PDF File on your PC or macOS.
- Make certain that you position the cursor on the accurate location you want the PDF File at the display.
- Further, click on the “Insert” option.
- Go to the “Text” section.
- Now, tap on the “object” symbol.
- Then, click on “From File.”
- It will take you to a list of files.
- Among these files, select the PDF File you want to insert in word docx.
- Now, click on the “options” alternative.
- Select the “Link to file” option.
- At last, tap on “insert.”
Shortcut to insert PDF in word document on Google Drive:
- Open the word document for which you intend to add the PDF File on your PC or macOS.
- Make certain that you position the cursor on the accurate location you want the PDF File at the display.
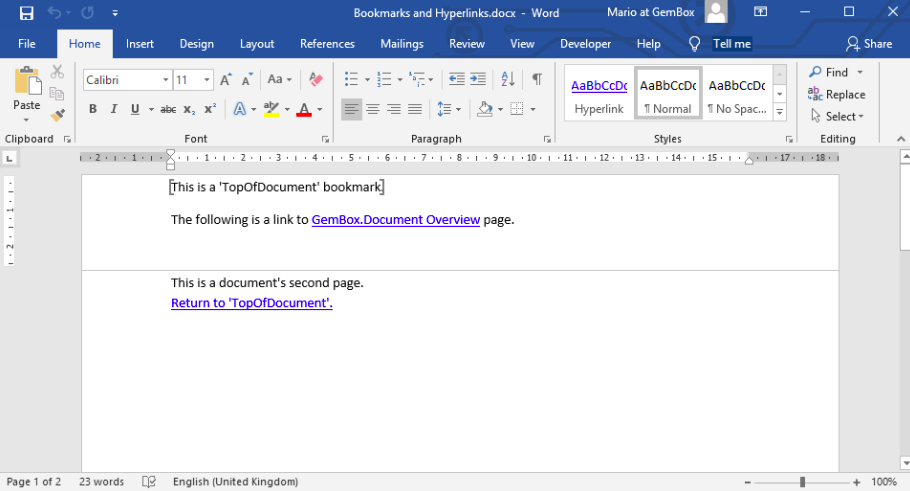
- Now, click on the “link” option or icon in the toolbar menu.
- Here, paste the link to the public PDF File.
- If the PDF File is on your computer or mac, type its name in the box.
- Finally, click on the “Apply” button.
- Direct link of your PDF File with title will appear in the word document.
Note: When you click on the linked PDF file, you will be redirected to a new tab where the PDF File will open. This is why it is called a clickable PDF method.
Method 3: Copy-paste PDF File into Word File (if PDF File contains text only)
When your PDF is a complete text file without any images or videos, the best way to insert such a P-D-F into a word document is by copy-pasting the text content in the document. This easy-to-process shortcut will save you a lot of time and effort. To do so, you can either directly copy-paste the entire PDF into the Word document, or you can also utilize the following guide. It will protect you from making copy-paste related mistakes:
- Open the word document for which you intend to add the PDF File on your PC or macOS.
- Make certain that you position the cursor on the accurate location where you want the PDF File to display.
- Further, click on the “Insert” option.
- Go to the “Text” section.
- Then, select the “object” option.
- After this, tap on the “text from file” option from the dropdown menu.
- In the “from file” dialogue box, select the PDF file of your choice.
- At last, click on the insert button.
- By doing so, all the text content from the selected PDF File will appear in the word document.
Note: You can also use this alternative to insert PDF file’s text only from files containing images. The only difference will be that the text will appear in the word document at the end of the process, and the images will not.
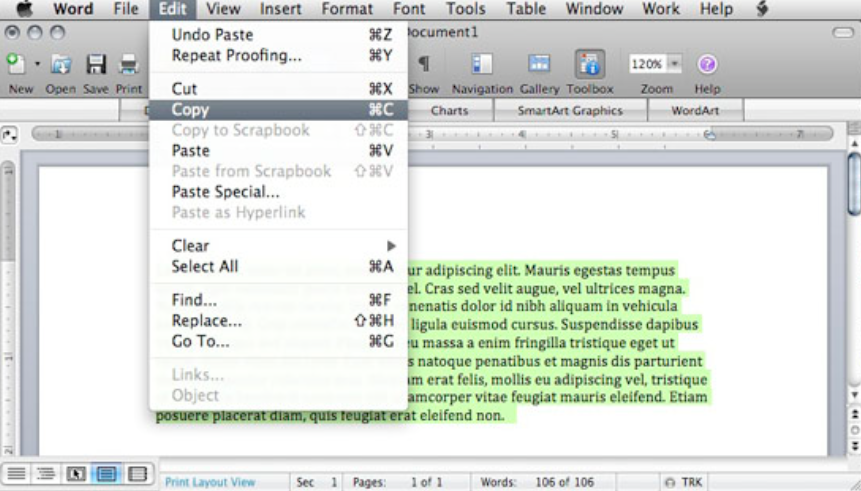
To resolve this issue, you can separately insert images in word documents which are quite easy. Insert > Images > From PC/computer > Select Image > Insert.
Method 4: Change PDF to JPG and Insert JPEG File into Word
In the event that you want to display the entire PDF content in your Word file, including images and text, this is the best method to go for. In this method, you can change PDF into JPG format (i.e.., image format). And then, you can directly insert the JPEG File (or image of the PDF) in the word document. Here’s how:
STEP 1: Change PDF to JPG File
- Go to https://smallpdf.com.
- Click on https://smallpdf.com/pdf-to-jpg.
- Tap on the “Choose File” option.
- Now, select the PDF you want to change to JPG.
- Click on the “Convert” option.
- As soon as the file successfully converts, tap on the “download file” option.
STEP 2: Insert JPG into Word Document
- Open the word document you want to add the file to.
- Go to the “insert” option.
- Tap on “images.”
- Select the latest downloaded JPEG File.
- Click on the “insert” button at the underside.
Method 5: Screenshot or Print PDF Pages and insert into Word
Presuming that you are unwilling to change PDF to JPG format or do not have time for such a long process, you can use this method instead. It is quick and easy. Here’s how:
For Windows PC:
- Open PDF File.
- Press Windows Key plus PrtScn key.
- Now, go to the “paint” software on your PC.
- On a black sheet, press CTRL + V (to paste the printed PDF).
- Further, go to the “File” option.
- Click on the “Save” or/and “Save as” option. Or, use a shortcut: CTRL + A.
- Now, simply open the word document.
- Click on the “insert” option.
- Tap on “images.”
- Select the image you saved earlier.
- Finally, click on the insert button.
You can print each and every page of the PDF File and add all printed images to the word document.
For Mac users:
- Open PDF File.
- Go to the “launchpad.”
- Click on “Others”
- Tap on “Screenshot”
- Take proper screenshots of each page in the PDF File.
- Now, go to the Word document.
- Add Screenshotted images to the document.
Note: If you think that your PDF requires editing, please do it beforehand. Once you screenshot or print screen PDF pages, you can no longer be able to make the changes appear automatically. Hence, you will need to repeat the entire process.
For further details or tips, drop us your queries in the comments. Thanks for taking this journey with us.

